A garage door opener looks simple until you are standing on a ladder with a motor unit overhead, a rail in pieces on the floor, and a door that suddenly feels a lot heavier than expected. If you are searching for how to install a new garage door opener, the biggest thing to know is this: the opener itself is usually manageable for a skilled homeowner, but the job only goes well when the door is already balanced, the parts are matched correctly, and safety steps are taken seriously.
For many homeowners, replacing an opener is less about adding a new gadget and more about getting daily life back on track. When your garage door will not open before work, will not close at night, or starts making grinding noises, convenience turns into a safety and security problem fast. That is why it helps to know where a do-it-yourself installation makes sense and where professional installation is the smarter choice.
Before You Install a New Garage Door Opener
Before you open the box, check the condition of the garage door itself. An opener is not designed to lift a door that is out of balance, off track, or dragging because of worn rollers or damaged hinges. If you disconnect the opener and the door feels extremely heavy, slams shut, or will not stay about halfway open on its own, that points to a spring or balance issue. In that case, stop there.
This matters because a new opener can be damaged quickly if it is connected to a door with existing mechanical problems. Homeowners often assume the opener is the whole problem when the real cause is a failing spring system or worn hardware. Installing a new unit on a bad door may get it moving for a short time, but it rarely lasts.
You also want to confirm the opener type fits your garage and your priorities. Chain-drive openers are reliable and often cost less, but they are usually louder. Belt-drive models are quieter and a better fit for attached garages. Wall-mount openers save ceiling space, but they are not right for every setup and usually require a specific door configuration.
Tools and Materials You Will Need
Most opener kits include the main motor unit, rail sections, trolley, mounting brackets, sensors, wall control, and remotes. Beyond that, you will usually need a drill, socket set, screwdrivers, adjustable wrench, step ladder, tape measure, level, stud finder, and angle iron if extra ceiling support is needed.
A helper is strongly recommended. You can technically assemble many parts on your own, but lifting and aligning the motor unit safely is easier with a second person. It also helps prevent crooked mounting, loose fasteners, and accidental damage to the opener housing.
How to Install a New Garage Door Opener Step by Step
Start by turning off power to the garage outlet and removing the old opener if one is already installed. Take down the motor unit, rail, safety sensors, and wall control. Keep the door in the closed position while you work, and do not loosen or tamper with torsion or extension springs.
Next, assemble the new rail and trolley system on the floor according to the manufacturer instructions. This is one part where small differences between brands matter. Some rails snap together, while others bolt together. The chain or belt tension also varies by model, so avoid guessing.
Once the rail is assembled, attach it to the header bracket above the garage door. That bracket must be anchored into solid framing, not just drywall or trim. If the bracket is loose, the opener will shift during operation and can create noise, premature wear, or outright failure.
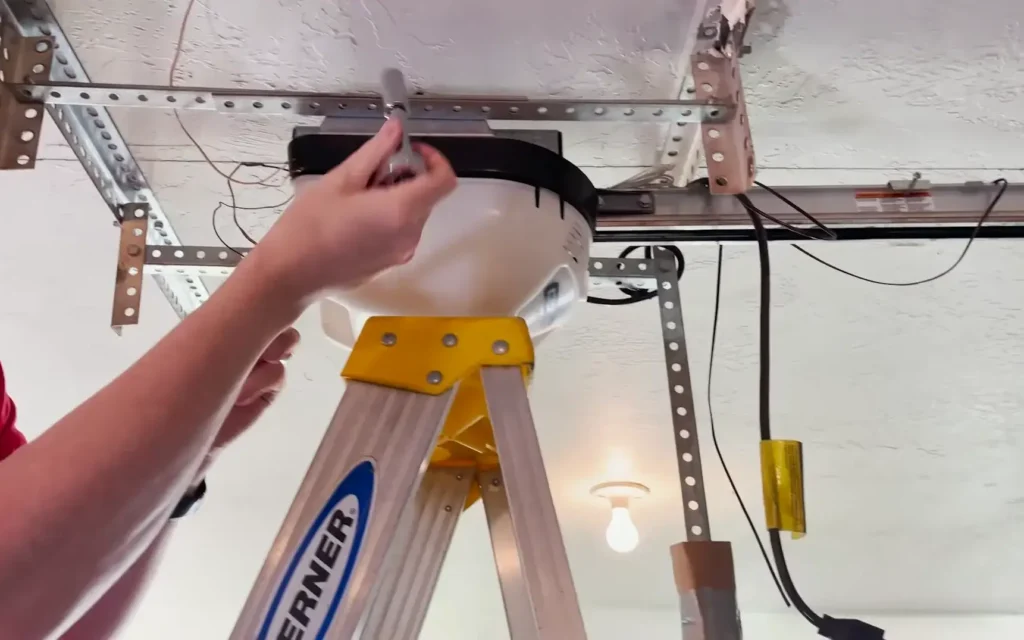
With the front end secured, lift the motor unit and mount it to the ceiling using the included brackets or angle iron supports. The opener should sit level and be firmly attached to structural framing. A sagging motor unit is not just sloppy installation – it puts stress on the rail and can throw the whole system out of alignment.
After that, connect the opener arm to the garage door bracket. The door bracket should be installed at the proper location on the top section of the door, usually reinforced if required by the manufacturer. This connection transfers the opener force to the door, so it needs to be centered and secure.
Then install the wall button and run the low-voltage wires neatly to the motor unit. Safety sensors go near the bottom of each side of the door track, facing each other across the opening. These sensors must be aligned properly and mounted at the correct height. If they are even slightly out of line, the door may refuse to close or reverse unexpectedly.
Once everything is wired, plug in the opener and program the travel limits and force settings. This is one of the most important parts of the job. If the down travel is set too far, the door can slam into the floor. If the force is too high, the opener may not reverse when it should. Test the auto-reverse system with an object placed in the door path, and test the photo eyes by interrupting the beam while the door closes.
Common Problems During Garage Door Opener Installation
The most common installation mistake is assuming the opener can fix a door that already has mechanical problems. If the door is noisy, jerky, crooked, or hard to lift manually, the opener is not the first thing to replace.
Another frequent problem is weak mounting. Header brackets and ceiling mounts need solid framing support. A unit fastened into inadequate material may work for a while, but vibration and door movement will loosen it over time.
Sensor issues are another headache. The lights may appear on, but that does not always mean they are aligned well enough for reliable operation. Even slight bumps, track vibration, or loose brackets can create intermittent closing problems.
Travel and force settings also get homeowners into trouble. More force is not better. Too much force can hide a door problem and reduce the safety performance of the opener.
When DIY Installation Makes Sense
A do-it-yourself installation can make sense if you are replacing an existing opener on a standard residential door, the door is in good working order, and you are comfortable with ladders, basic wiring, and careful assembly. If the opening is conventional and the instructions are clear, many homeowners can handle it successfully.
It also helps if you have time to work without rushing. Garage opener installation usually goes more smoothly when you can stop, double-check measurements, and test everything thoroughly. Trying to finish it quickly before dark or between errands is where mistakes tend to happen.
When to Call a Professional Instead
If the door is heavy, unbalanced, off track, damaged, or paired with worn springs, call a professional before installing anything. The same is true if you are dealing with a high-lift setup, a wall-mount unit, a very heavy wood door, or a garage with unusual framing.
Professional installation is also worth it if you want smart features set up correctly the first time, including Wi-Fi connection, keypad programming, vehicle integration, and battery backup testing. For many homeowners, the value is not just the labor. It is the confidence that the opener, door, sensors, brackets, and safety systems are all working together the way they should.
A licensed and insured garage door technician can also spot issues you may not notice, like worn rollers, cracked hinges, loose bearings, or reinforcement needs on the top section. That can prevent repeat service calls and help your new opener last longer.
How Long Installation Usually Takes
For a straightforward replacement, an experienced installer can often complete the job in a few hours. A homeowner doing it for the first time should expect it to take longer, especially if the old system has to be removed, framing needs adjustment, or setup instructions are more involved than expected.
That time difference matters if your garage is your main entry point. Leaving a door disconnected or unsecured overnight is not ideal, especially when security is already a concern.
What a Safe Installation Really Comes Down To
If you remember one thing about how to install a new garage door opener, make it this: the opener is only one part of the system. A safe install depends on a balanced door, solid mounting, proper sensor alignment, and correct limit and force settings. Skip any of those, and the opener may still run, but it will not run the way it should.
For homeowners who want the job done quickly and correctly, professional installation often saves time, avoids frustration, and reduces the risk of damage to a brand-new unit. And if your current opener failed because of a larger garage door problem, getting an honest diagnosis first is usually the smartest move.
If your garage door is giving you mixed signals – part opener issue, part door issue, or hard to tell which – slow down before you start replacing parts. The safest repair is the one that fixes the real problem, not just the symptom.